Setup instructions
-
Windows VPN
-
Apple VPN
-
Linux VPN
-
Android VPN
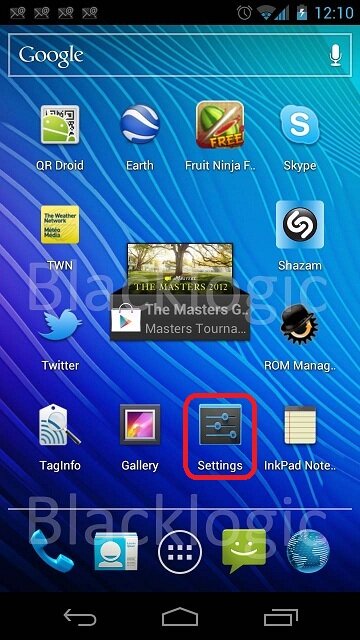
1. Select Settings
2. In Wireless and Networks select VPN.

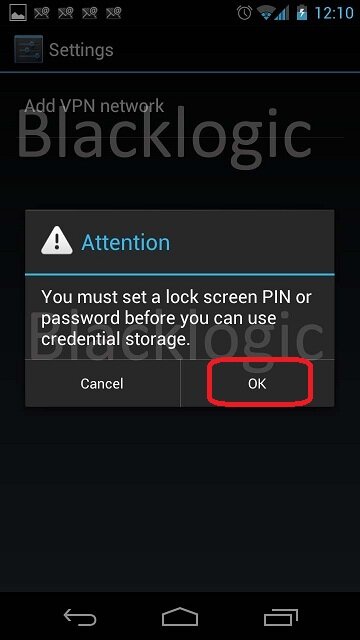
3. You'll need to configure Lock Screen Pin in order configure VPN.
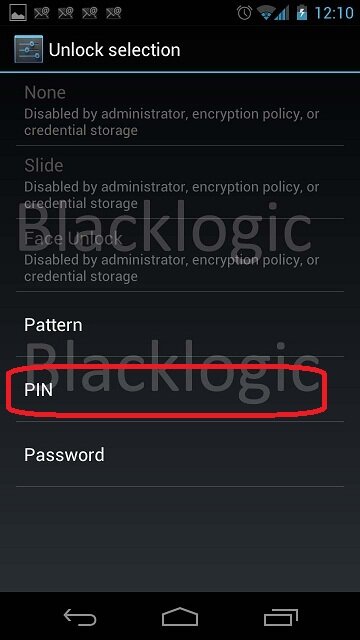
4. Select preferred Phone Lock mode.
5. Select your unique PIN code.
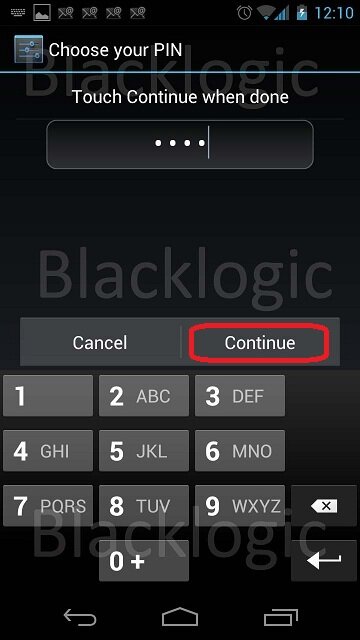
6. Confirm PIN.
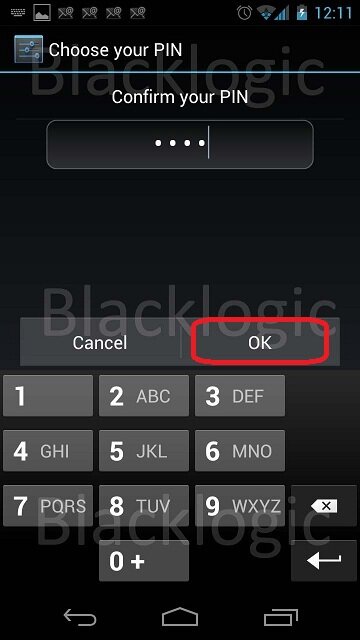
7. Press Add VPN Network.
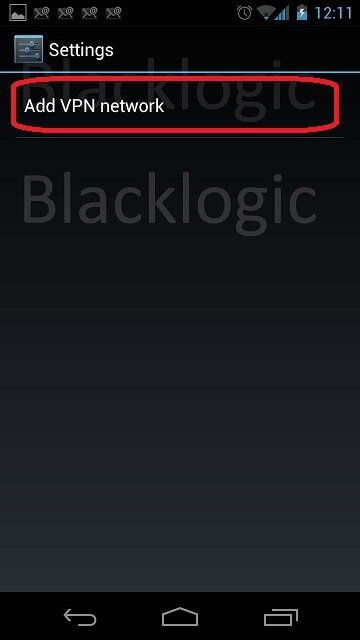
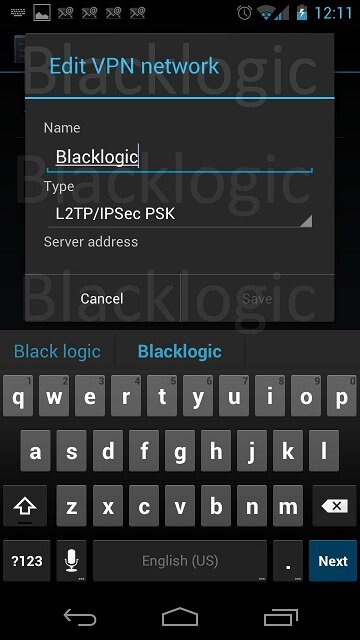
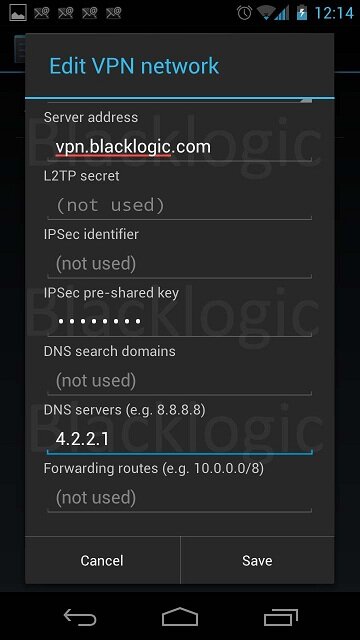
8. VPN Name - Blacklogic. VPN Type - L2TP/IPSEC PSK.
9. Server address - pick from the Activation email. IPSEC pre-shared key - find in the Activation email.
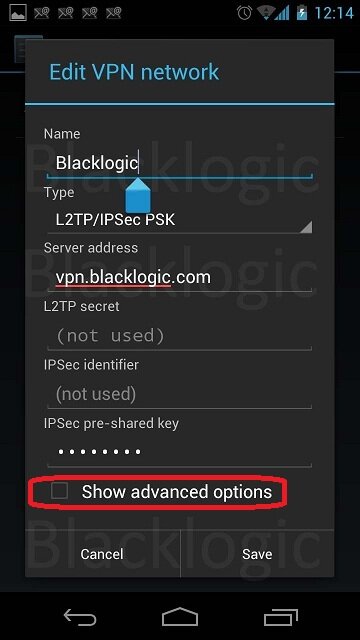
10. Press Show Advanced Options and in DNS servers enter 4.2.2.1 Press Save.
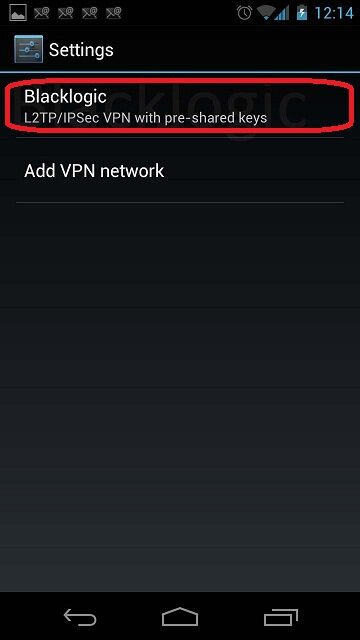
11. VPN Setup is done. Press Blacklogic
12. Enter your VPN username and password. Press Connect
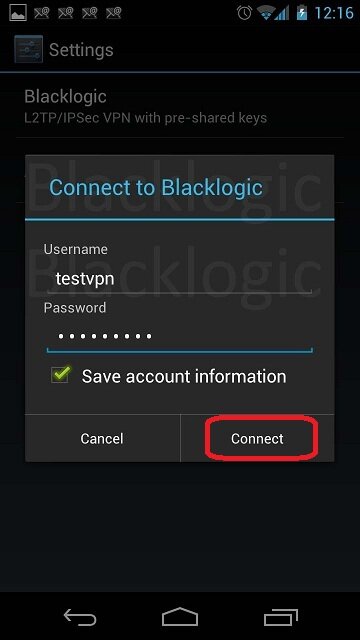
13. Blacklogic VPN is now connected

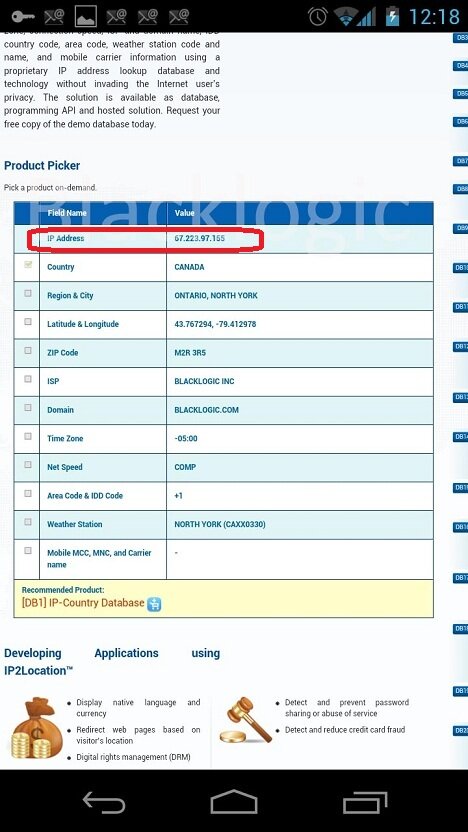
14. For testing purposes you may navigate to www.ip2location.com and check your IP address
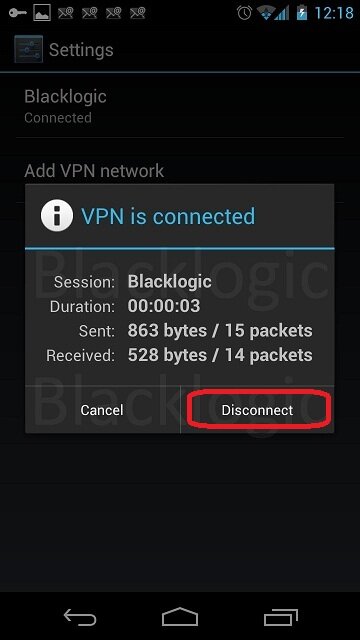
15. To Disconnect from Blacklogic VPN, press on Blacklogic and press Disconnect.
-
DD-WRT VPN
-
BlackBerry VPN
Great service, very reliable. I would however wish for Blacklogic to support Windows Phone 8.1 VPN as described by Microsoft here http://technet.microsoft.com/en-us/dn673608
Thanks.
I'm up and working now, easy set up. So far looks good.
Blacklogic is great. Service is fast and cheap - $100 for a whole year. My location blocks Hulu and iTunes and Blacklogic restores my access.
Easy to setup, prompt communications, overall easy website to navigate. I liked being able to call the company toll-free and actually talk to a live human being.Thanks Guys
I am a longtime happy camper having used Blacklogic, Inc for VPN service for over 5 years. They have consistently provided good service.
Pretty good, easy, fast, and unlimited. I like Blacklogic VPN, and I'm gonna extend the package for another year.
I was amazed by this service, how it's fast, easy and reliable with a responsible price.
Without a doubt these guys are the industry best for providing a safe, quality and fast VPN experience. I have never had a single issue in over 2 years that has not been resolved instantly.